Warning
This extension is not maintained anymore. Please use Amazon Pay (Checkout v2) instead.
Prerequisites
System requirements
Amazon Pay for Europe Magento extension requires you to have a valid Amazon Pay account (refer to the Amazon Pay and Login with Amazon account setup if you don’t have one yet) and a webserver running a Magento store instance with following conditions met:
- Magento CE (1.5, 1.6, 1.7, 1.8, 1.9) or EE (1.11, 1.12, 1.13, 1.14)
- cURL for PHP
- DOM / XML for PHP
- valid SSL certificate (for Login with Amazon and / or IPN handling)
Note
An additional fix needs to be installed for Magento 1.5. Please refer to the FAQ to get more details.
Amazon Pay and Login with Amazon account setup
Registering an Amazon Payments Account
- Go to:
- DE merchants: https://payments.amazon.de/preregistration/lpa
- UK merchants: https://payments.amazon.co.uk/preregistration/lpa
- Click
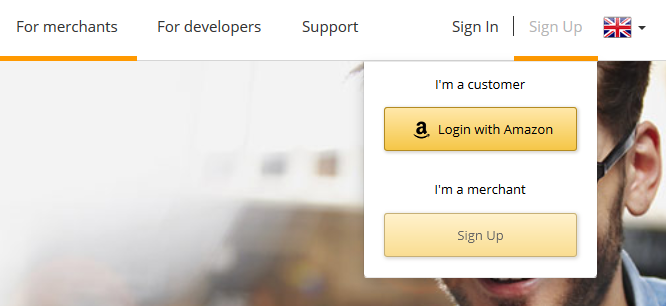
- Go through the questionnaire to find out if you qualify for using Amazon Payments, then click Sign up now
- At the moment you cannot add your Login and Pay with Amazon account to an existing Amazon merchant account. You have to register a new account specifically for the Advanced Payments APIs.
- Start registering a new account:
- If you see the link Would you like to create a new account using a different e-mail address? Click here, please do so.
- Enter a name for your business. In case this name is already taken, please choose a different one.
- Enter an email address and a password. You should choose a role email address that will be read directly by the people responsible for the Amazon Payments integration. You should avoid general addresses like info@ that are only forwarded to the general administration.
- Choose a secure password.
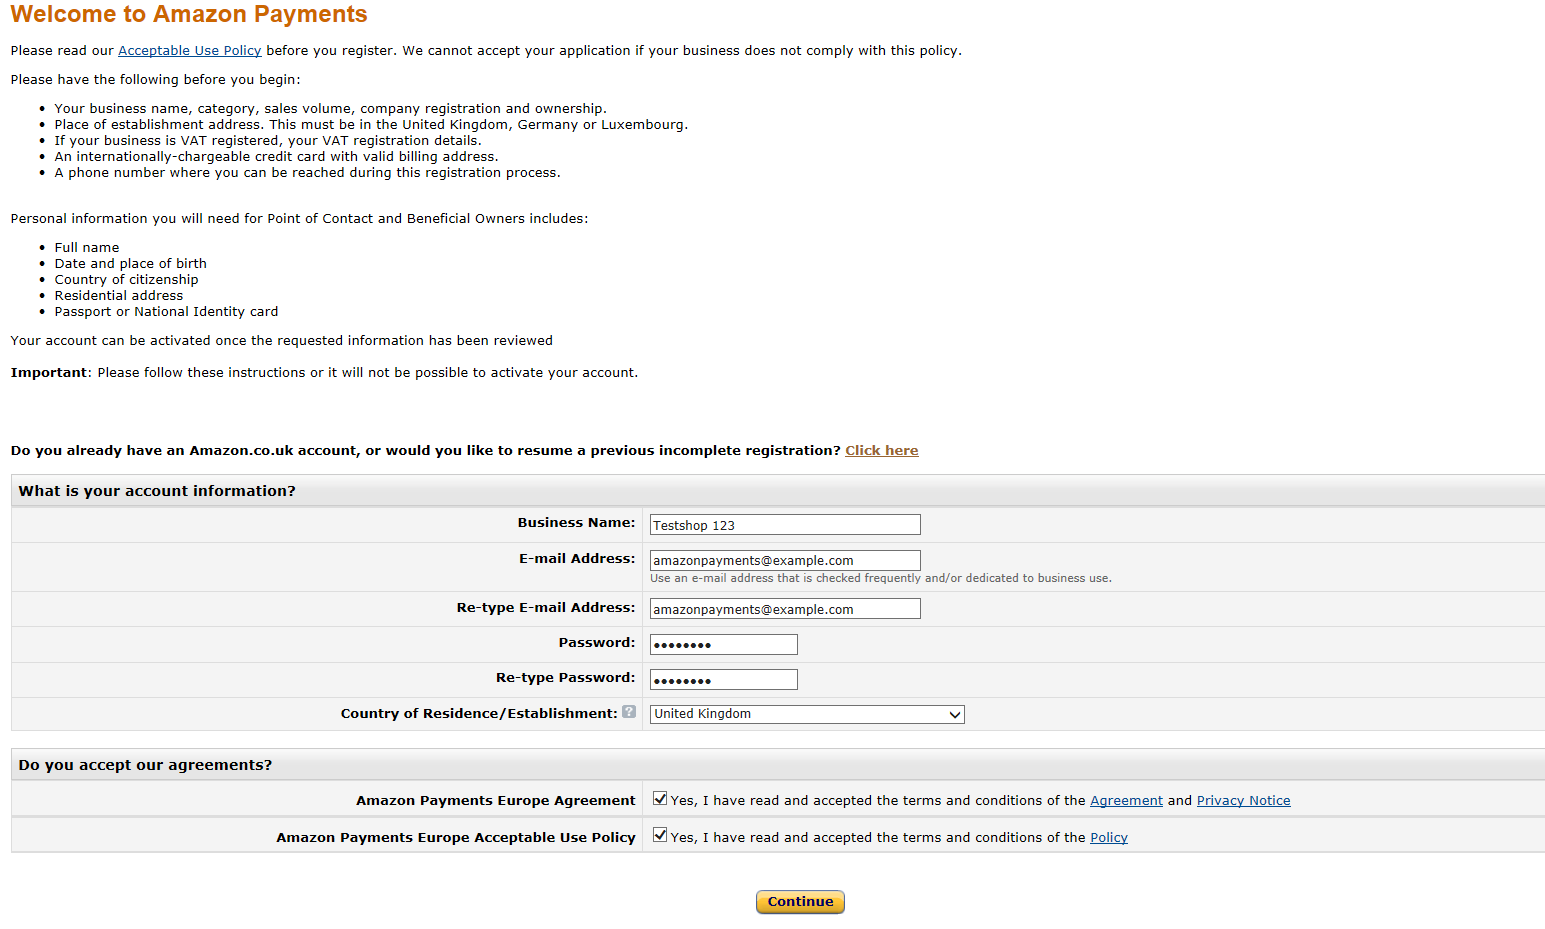
- Please fill in all requested information about your seller account, your contact information and your bank account or credit card data.
- Please be careful to provide exact and correct data. All information you provide will be verified by Amazon Payments, and incorrect information will delay the verification process.
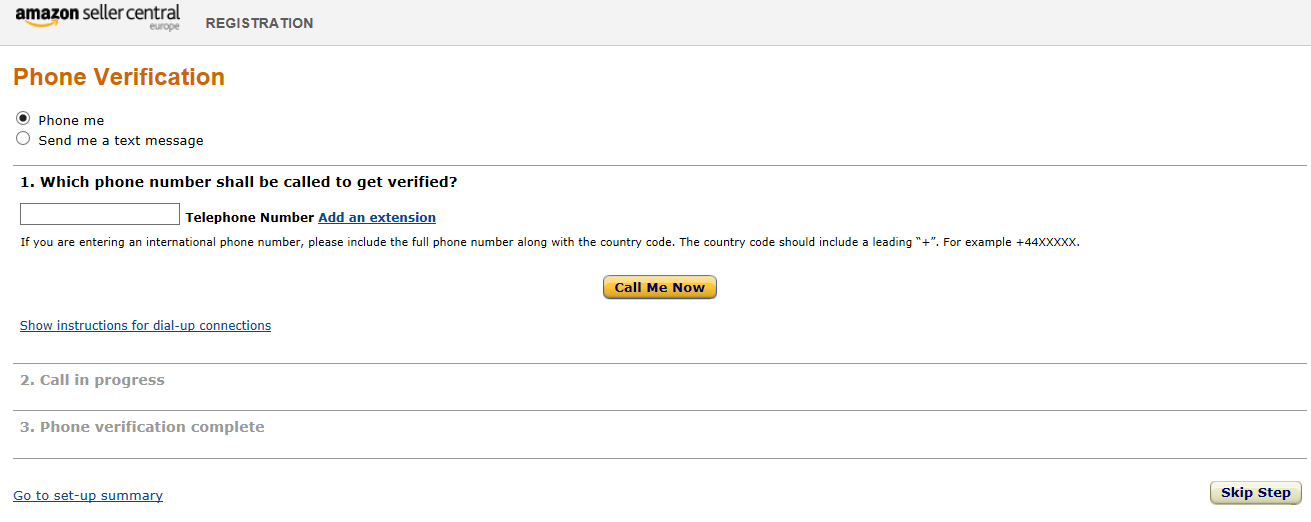
- After providing all information there will be an identity check on the phone, where you will be asked to enter a PIN.
- Afterwards you can complete your registration
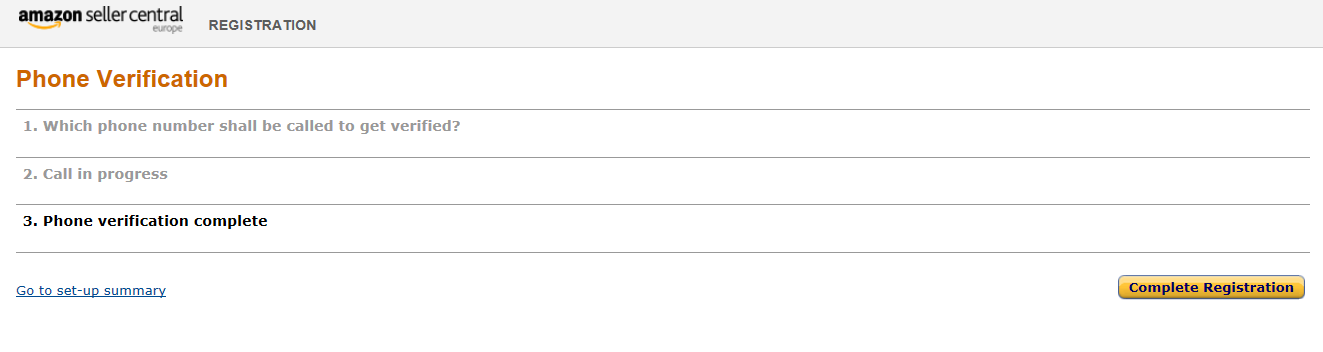
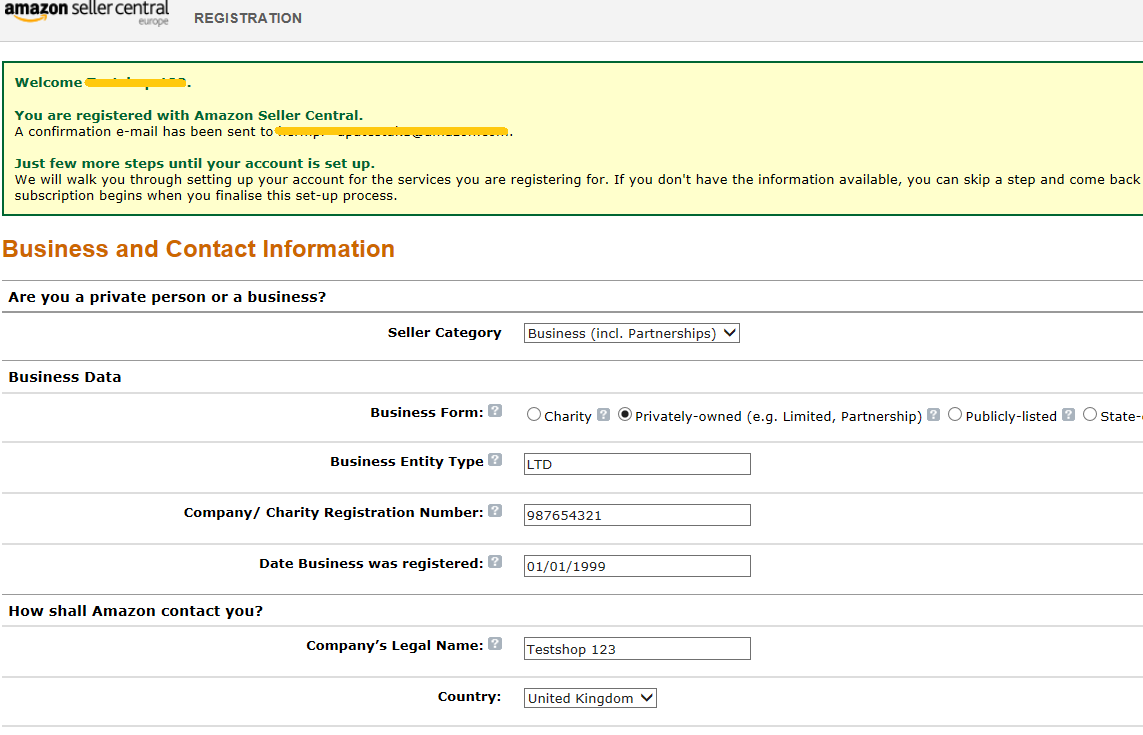
- After your account is registered you will be forwarded to your Seller Central account.
- Please be aware that you cannot fully use your account yet. First you have to provide your identity data, and then the account has to go through the verification process.
Entering identity data in Seller Central
To get the verification process started, please log in to Seller Central: https://sellercentral-europe.amazon.com/gp/homepage.html
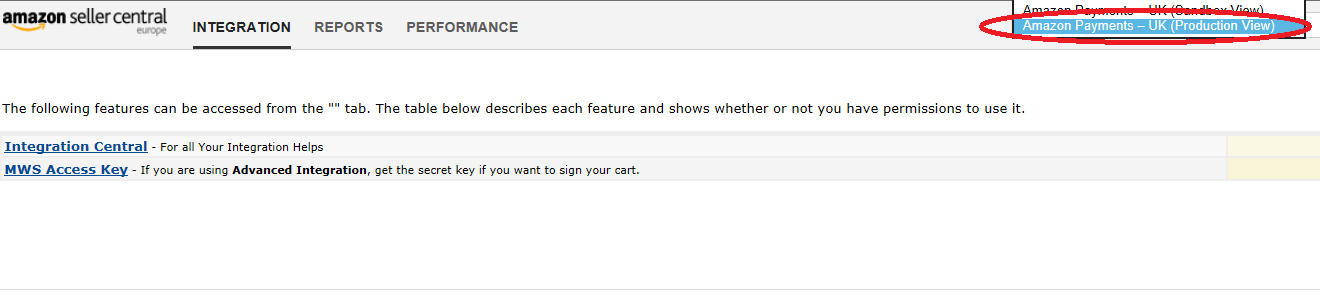
For a combined account (Login and Pay with Amazon added to an existing account), please make sure that you have selected the Amazon Payments – Production View in the drop down menu on the top.
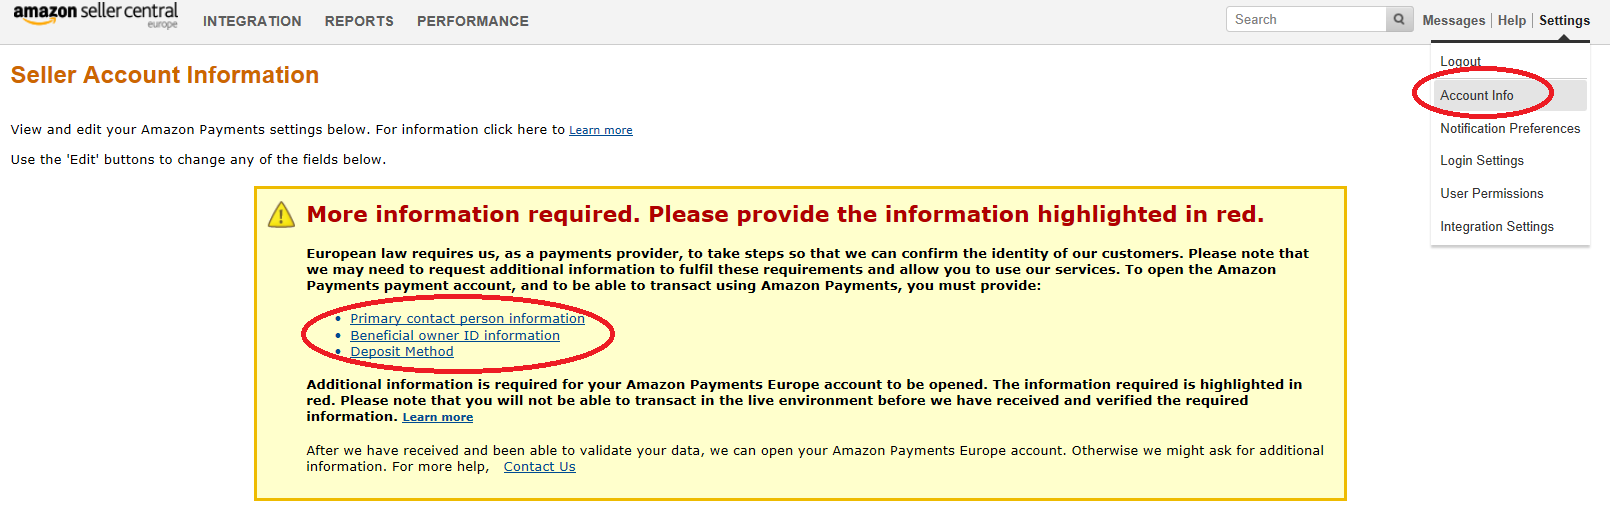
At please provide the requested missing information. Especially it is crucial to provide the ID information for all relevant persons.
Verification Process / Verification of all given information by Amazon Payments
After successful registration of the Amazon Payments seller account and entering the ID information Amazon Payments will check all information provided. Depending on the information provided Amazon Payments may request more information.
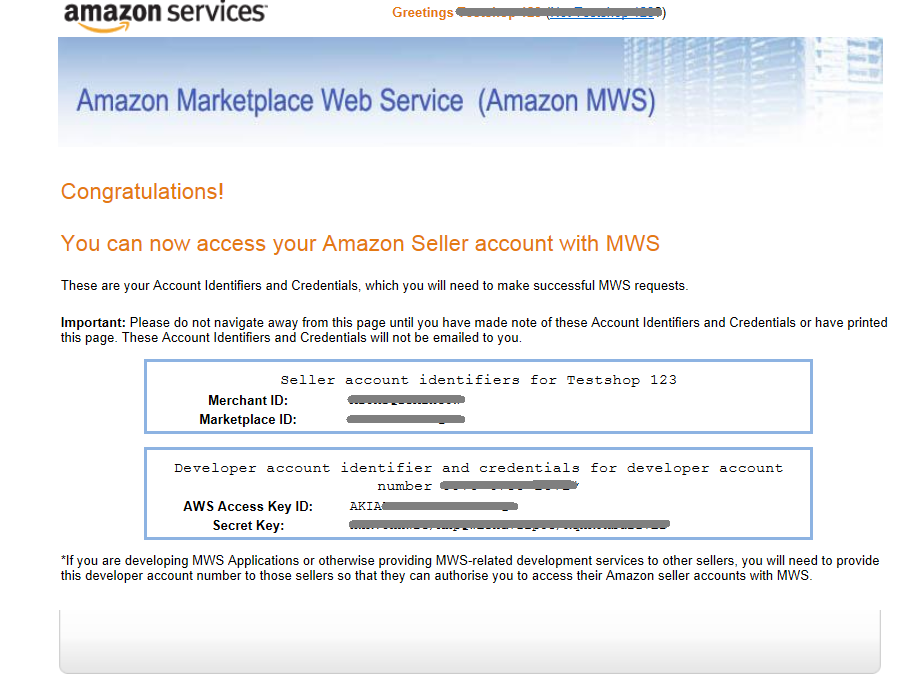
Creating MWS access keys
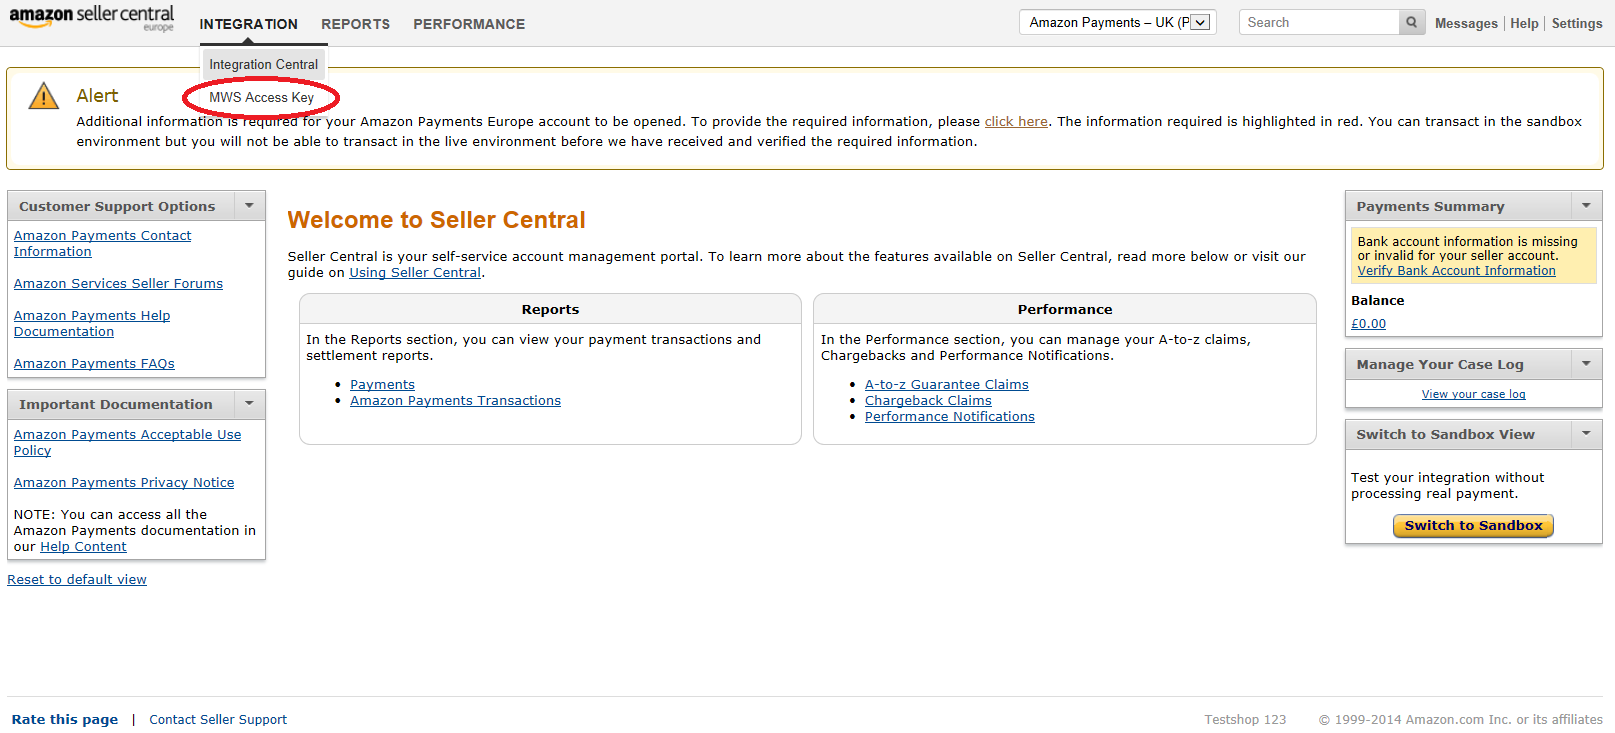
You can generate your MWS access keys in Seller Central. Please go to
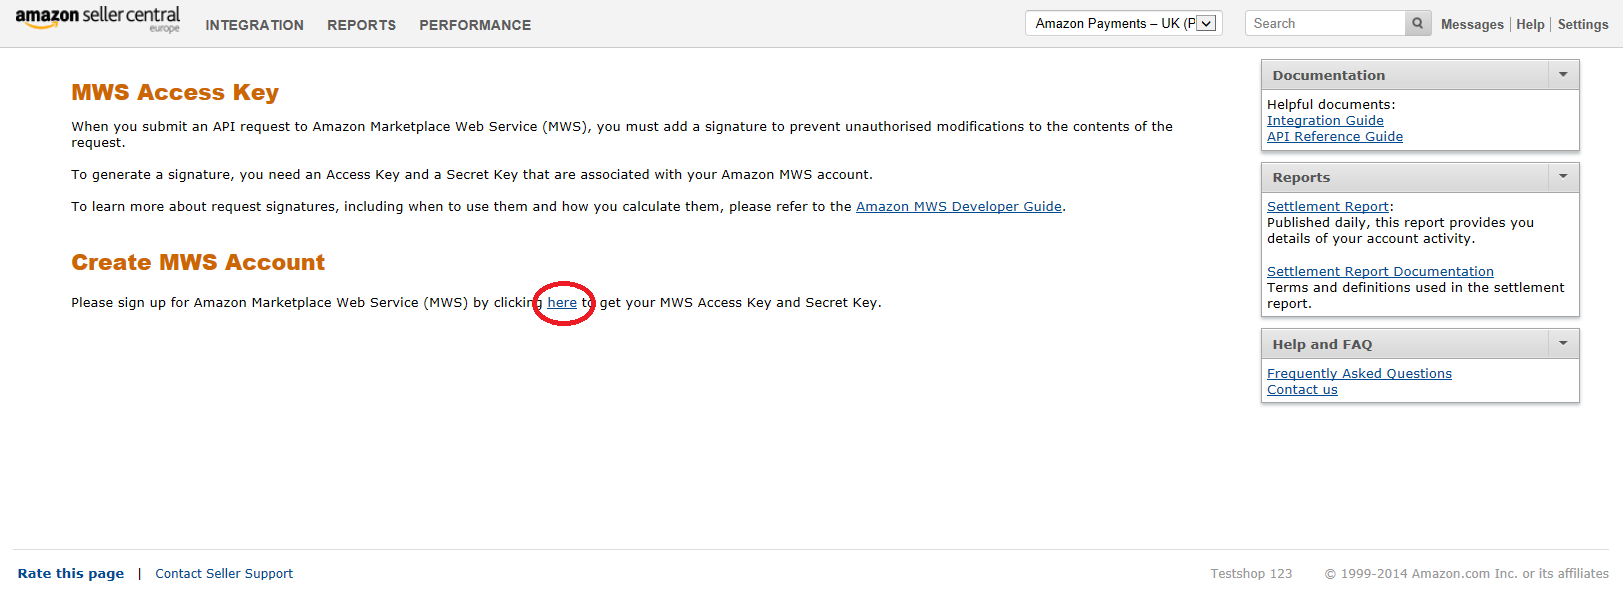
Log in again with your Amazon Payments account credentials
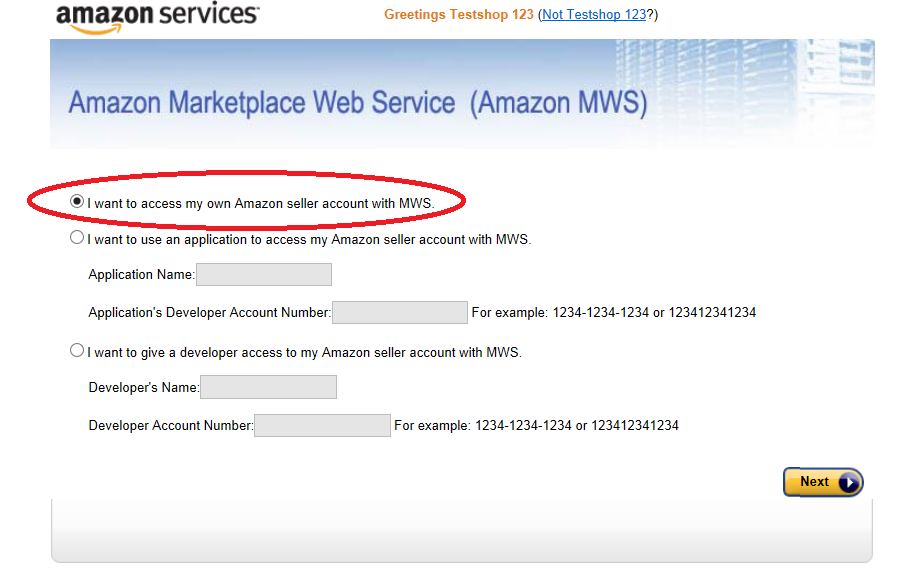
Make sure that you register the MWS Access Key for your own account.
Please read and accept the license agreement.
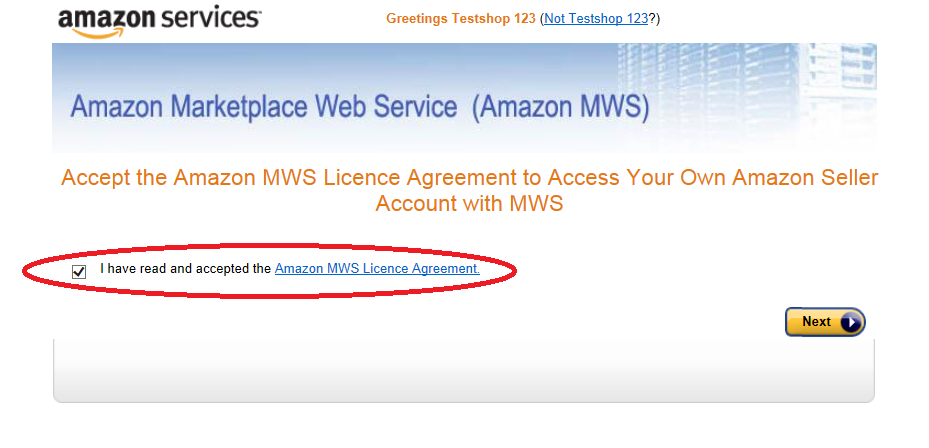
The AWS Access Key and the Secret Key among with the Merchant ID, will be presented to you on the next page. You can always review the key information in Seller Central on the page.
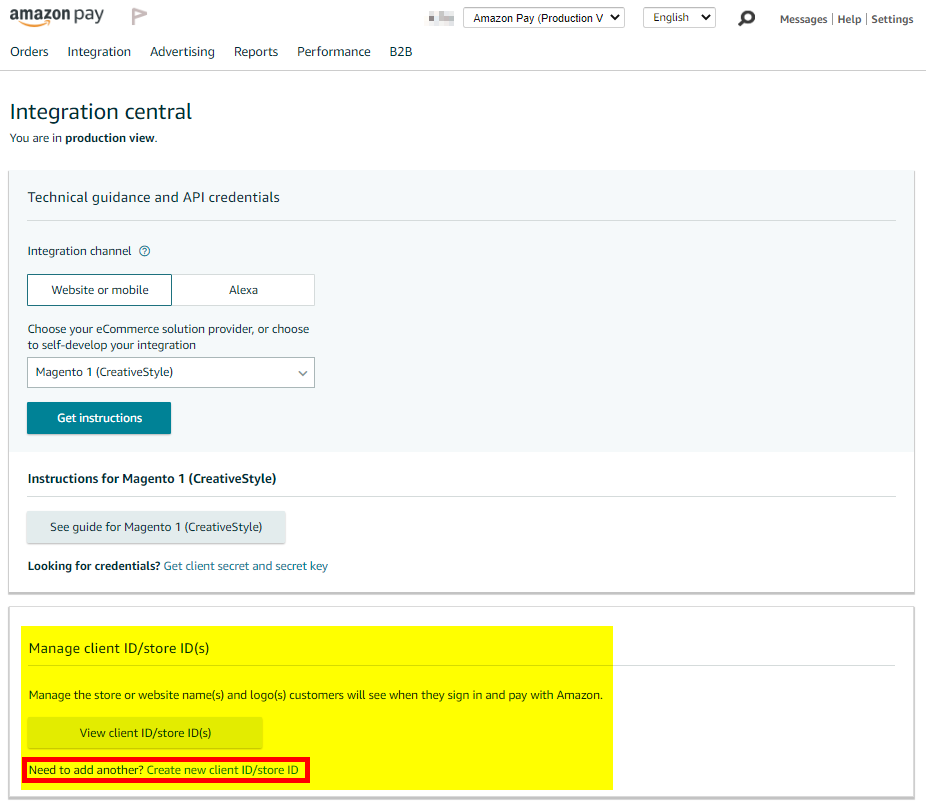
Registering application for Login with Amazon service
Login and Pay with Amazon work together to provide a great buyer experience. To use Login with Amazon you have to register the application (Magento extension) that will be allowed to access buyers accounts through your Amazon Payments seller account. Login with Amazon configuration settings can be accessed through Integration Central in Seller Central.

On Integration Central page, scroll down to the ‘Manage client ID/store ID(s)’ sectionOn and register a new application by clicking the ‘Create new client ID/store ID` button at bottom.
On the Create new client ID/store ID form, add basic details about your web site. These details will be used on your website and mobile apps (if applicable). .. image:: /images/prerequisites_screenshot_21.png
- Application or store name. This is the name displayed on the consent screen when the users agree to share the information with your web site. This name applies to website versions of your application.
- Description. A description of your web site for Login with Amazon users.
- Upload a logo. This logo will represent your business or website on Amazon. The logo will be displayed as a 150x150 pixel image; if you upload a file of a different size, it will be scaled to fit.
- Privacy policy URL. The Privacy URL is the location of your company privacy policy. It is also displayed on the consent screen. This link is displayed to users when they first login to your application (for example: http://www.example.com/privacy.html).
- Allowed JavaScript origins. The URL of your shop (for example: http://www.example.com). To add more than one origin (in case you are running domain based multi-store Magento installation and all stores are using the same Amazon Payments seller account), click Add another URL.
- Allowed return URLs. The Login with Amazon authorization service redirects users to this URL when they complete login (for example: http://www.example.com/amazonpayments/advanced_login/redirect/).
On top of the creativestyle plugin configuration page you can find the URLs that need to be added to the Create new client ID/store ID form mentioned before. .. image:: /images/prerequisites_screenshot_22.png
Note
To use Login with Amazon with your Magento shop, you MUST specify an allowed JavaScript origin.
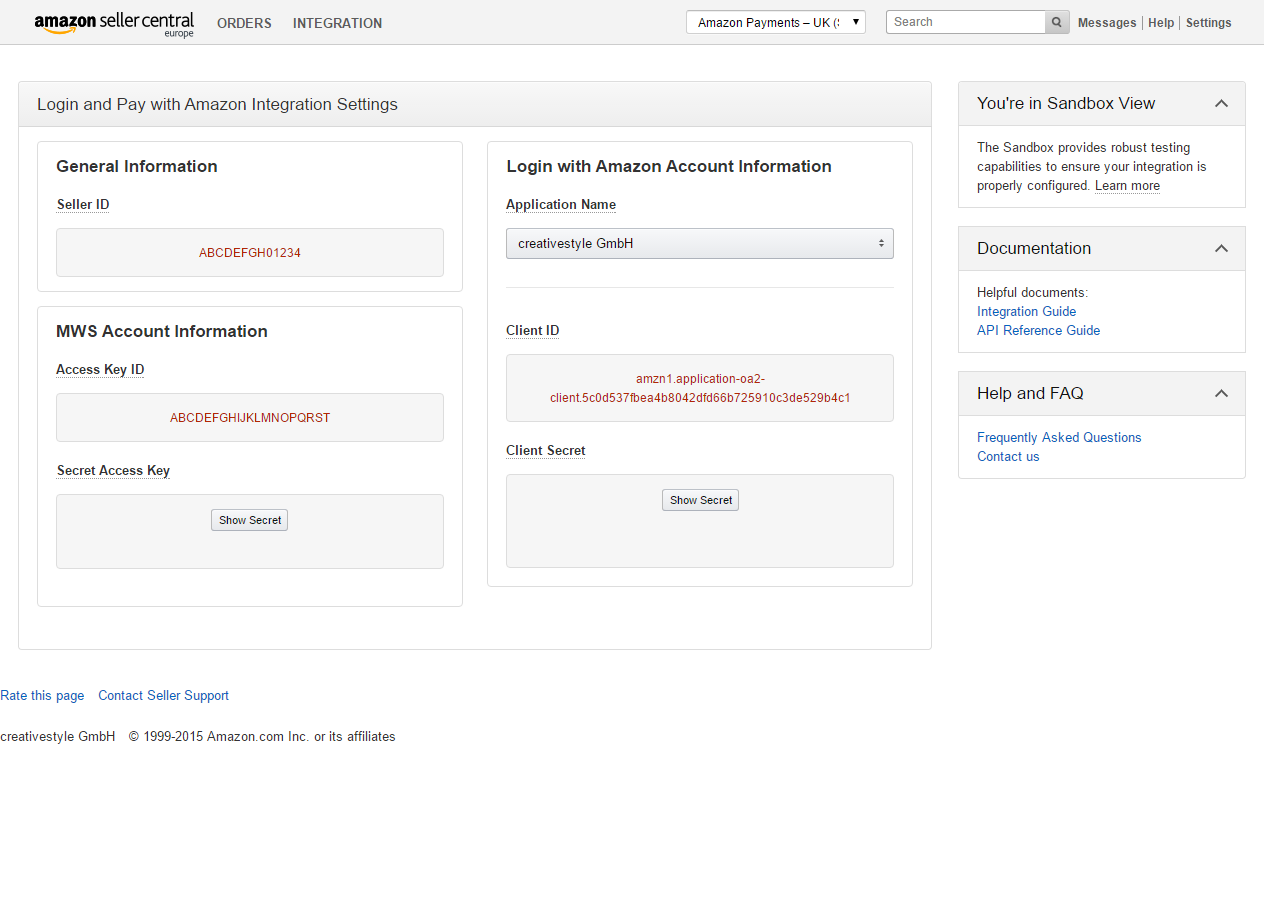
Where to find the required credentials to configure the Magento extension
Magento extension requires you to enter information about your Amazon Payments account. You will need to enter:
- Merchant ID (aka Merchant Number, Händlernummer, Händler-ID)
Note
The Merchant Token IS NOT Merchant ID.
- AWS Access Key (aka AWS Access Key ID, AWS-Zugangsschlüssel, AWS Zugangsschlüssel-ID)
- Secret Key (aka AWS Secret Key, geheimer Schlüssel)
For Login with Amazon service you will also need:
- Client ID
You can find this information in your Amazon Payments seller account in Seller Central.
Configuration required in Seller Central
If you’re planning to use IPN for the post-payment processing you need to enter a Merchant URL (IPN endpoint URL) in Seller Central. You can do this at , then click the Edit button at Instant Notification Settings. IPN endpoint URL can be obtained from Magento admin at , see: IPN endpoint URL.